
I Am... One Day No-Knead Focaccia
If you love bread, this recipe is for you: no knead, one day, full proof, homemade bread. Specifically, an impressive bubbly, crispy, gloriously golden tray of no knead focaccia is the stuff bread dreams are made of. I love bread so much. I have a sourdough starter (named Justin Bread-ber) that I love so much that I have both dehydrated and frozen back ups of him. Bread is absolutely magical. That being said, I know that bread can be intimidating even though it is the easiest thing to make. I mean, people baked bread back in the day when there was no electricity or ovens. But no-knead focaccia is the best thing to start with. If they can do it, you can do it. I believe in you.
What is focaccia?
Focaccia is a delightful oven-baked Italian flatbread that is made with yeast. It comes in rounds, rectangles, and squares. It’s bubbly and squishy and has a signature golden brown top that’s dimpled and adorned with olive oil, flaky salt, and herbs. There are so many regional types of focaccia that you could do a focaccia tour of Italy twice around and still find different kinds to eat. It’s a beauty of a bread because there are so many varieties topped with different ingredients.How to make no knead focaccia
- Measure - start off by measuring out the flour, water, yeast, and salt. It’s best to use a kitchen scale, but if you don’t have one, I’ve included cup measurements. Thankfully bread is super forgiving and you don’t need to be extra accurate.
- Stir - Stir the flour, water, salt, and yeast together in a bowl until everything comes into a shaggy ball.
- Proof - Cover the dough and let it proof for 30 minutes in a warm spot in your kitchen. After 30 minutes, lightly wet your hands and grab some of the dough and fold it over and in on itself. After each fold, turn the bowl 90 degrees. In the end you’ll complete 4 folds. Cover and let the dough proof for another 30 minutes. After 30 minutes, lightly wet your hands and grab the dough with both hands, scooping it up and holding it over the bowl. Some of the dough will naturally fall down towards the bowl. Tuck the ends that fall down towards the bowl under the dough. Turn the bowl 90 degrees and repeat. The dough will look like a blobby rectangle.
- Dimple - Drizzle olive oil in a cake pan and place the blobby rectangle directly into the olive oil. Use your fingers to gently spread out the dough and dimple slightly. Cover and let rise for 30 minutes to an hour, or until doubled and poofy. Right before baking, drizzle generously with olive oil and dimple the dough: use your fingers to press down into the dough, almost all the way to the bottom of the pan.
- Bake - Bake the focaccia in a preheated 450°F oven for 20-25 minutes or until golden and baked through. Let cool in the pan for 30 minutes before enjoying warm or at room temp.
No knead focaccia ingredients
- flour - regular all purpose flour is what we’re using. If you have bread flour on hand, it will give your focaccia more structure and therefore more fluffiness, but it’s not absolutely necessary.
- salt - bread is only 4 ingredients and salt is essentially for flavor. If you want to get fancy you can use flavored salts on top, but in the dough, simple fine table salt is best because it dissolves easily into water.
- yeast - we’re going for instant yeast, the kind that comes in little packets or jars. Just look for yeast that says “quick-rise” or “fast-rising.”
- water - this is a 90% hydration dough meaning there’s quite a bit of water in it. The large amount of water is what makes it super easy to stir up the dough so we don’t need to knead it. We want a warm-ish water so the yeast has a happy environment to grow. In this case, warm means warm but not hot to the touch.
- olive oil - you can’t have focaccia without olive oil. Giving your baking pan a nice drizzle of oil means your focaccia gets a crisp and almost deep fried bottom crust. A generous drizzle of olive oil on top and in the dimples of focaccia is signature. Make sure you’re using an olive oil you like the flavor of.
- toppings - you can keep it simple and just go for olive oil and salt. You can also go a with a bit more and add your favorite fresh herbs. Really, you can top this with anything: tomatoes olives, cheese, garlic, go wild!
Why no knead focaccia?
The beauty of no-knead bread is that the ingredients do all the work for you. You don’t need a mixer, a bread machine, or to even really use your arm muscles. Everyone can make no-knead bread, with little to no equipment. No-knead bread is the gateway bread, the bread will show you how it’s possible to make homemade bread yourself!How does no knead bread work?
Typically, when you make bread, please excuse this pun, you need to knead it. Kneading bread is what develops the gluten in the dough, making bread chewy. It also incorporates air which is what makes the dough puff up and inflate when proofing and baking. No gluten and no air means flat, dense bread. So, then, how and why does no-knead bread work? It’s science! No-knead bread uses a relatively long rising (fermentation) time instead of kneading to develop gluten. No-knead breads have a very high hydration, meaning they have a lot of water in the dough, making it easy to mix with a wooden spoon or silicone spatula. Instead of kneading a small amount of water into a large amount of flour, an almost equal mix of water and flour and simply stirred together. Time and yeast do the rest of the hard work by producing a bubbly, strong, elastic network that holds air well.What is lukewarm water for bread?
We want water that’s warm to the touch, but not hot, if you want to get specific, we’re looking for between 80°F and 100°F.How to do stretch and folds
Stretch and folds are super simple. It helps if you think of your bowl as cardinal or compass directions. The top of the bowl is North, the bottom is South, right is East and left is West. Lightly wet your hands and scoop underneath the dough at North. Pull the dough up and fold it over down South. Then, scoop under the dough South and fold it up towards North. Do the same with East and West. You will have completed 4 folds.How to do coil folds
Coil folds are stretch and folds but in the opposite direction. Instead of folding the dough up and over on top of itself, you’re folding it underneath. Lightly wet your hands and use both hands to reach underneath the dough and pull up so the dough is hanging from your hands. Some of the dough will naturally fall down or stick to the bowl so it’ll look like you’re holding a very floppy cat. Tuck the two floppy ends underneath the bulk of the dough, first the top floppy part, then the bottom floppy part, kind of like you’re folding a letter in thirds. Turn your bowl 90° and do another stretch and fold. Your bread should look kind of like a loose blobby rectangle.No knead focaccia tips and tricks
Here are some tips and tricks to make your focaccia the best it can be:Cold fermentation
Some people are very particular about the flavor of yeast. I’m one of them. I definitely prefer slow, cold fermented doughs which means if I have enough foresight, I will almost always make my dough the day before and let it cold ferment in the fridge. What this means is stopping (also card retarding) the proofing. When you put dough in the fridge, the coldness slows down the yeast growth and stops the yeast from digesting the flour. Slower yeast growth leads to better flavor development because there is less off gassing. If you do a cold ferment, you’ll want to put your dough in the fridge after the second set of coil folds, once you have put your dough into the baking pan. Keep it wrapped up and just pop it in the fridge. The next day, about 2-3 hours before you want to eat your bread, take the pan of focaccia out of the fridge and let it sit at room temp or in a happy proofing temperature for 2 hours or until doubled and very poofy.What temperature for proofing no knead focaccia
If you’re really particular and want to have the ideal temperature for your focaccia to thrive, you’ll want your ambient air temperature to be 85°F. Nice and toasty for all the yeasties to grow and bubble. Some ovens have a proofing setting and if yours does, go ahead and use it. Otherwise, you can always pop your proofing focaccia into your toaster oven or microwave; just be sure to leave a sign on the door so no one accidentally kills all your hard work.What kind of pan for no knead focaccia
You can really use any kind of pan you want as long as it can contain your dough. If you use a rimmed sheet pan your focaccia will be thinner and if you want a fluffier, thicker focaccia, you should use a cake pan. This recipe will fit nicely into an 8 inch cake pan or a rimmed quarter sheet pan. In this post, I used an 8.6 x 6.6 inch rectangular pan.When to dimple?
Most people dimple their focaccia at the end, right before they pop it in the oven. The truth is, you should dimple twice: right when you put your dough in the baking pan and then again right before you bake. Dimpling the first time helps expel any extra air which will give your focaccia a good crumb. Dimpling right before you bake means you’ll get more airy bubbles and a good crumb. Because the dimples are little pockets where the olive oil can pool, you’ll want to have just the right amount. Dimpling right before you bake helps you know that you’ve proofed just enough. The dimples will stay indented and the dough around dimples will be bubbly and airy.Bread heads
For all the bread heads out there, this is a 90% hydration dough which makes it super fluffy and bubbly. Here are the baker percentages if you want to adapt the recipe:| Ingredients | Grams | Baker’s % |
| flour | 240 | 100% |
| salt | 5 | 2% |
| instant yeast | 2.5 | 1% |
| water | 225 | 90% |
More breads
Once you’ve dipped your toes into bread making, try these recipes out:- Parmesan garlic knots - seriously the BEST garlic bread knots you’ll ever have
- Soft and fluffy Parker House rolls - these are so soft and pillowy, you’ll want to make a bed and sleep on them
- Sourdough of course - Try your hand at sourdough. Step-by-step instructions on how to cultivate your very own starter and make your first loaf with wild yeast
- Pretzels - Homemade pretzels are a serious flex, they take a bit more time than these regular bread but they are so worth it
- And even Pretzel Dogs - it’s almost Oktoberfest so why not make some pretzel dogs
One Day No-Knead Focaccia
Make impressive bubbly, crispy, and gloriously golden focaccia with almost no effort.
- 2 cups all purpose flour (240 grams)
- 1 tsp salt (5 grams)
- 3/4 tsp active dry yeast (2.5 grams)
- extra virgin olive oil (to taste)
- flaky sea salt (to taste)
- fresh rosemary (to taste)
In a large bowl, whisk together the flour and the salt.
In a small bowl or liquid measuring cup, add 225 grams (about 1 cup) warm water. Sprinkle on the instant yeast.
Stir the yeast into the water then add to the bowl with the flour and salt. Use a silicone spatula to mix well, until everything comes together in a shaggy ball. Scrape down the sides if needed, then cover and let rest for 30 minutes.
After 30 minutes, use lightly wet hands (or you can use nitrile kitchen gloves) and complete a set of stretch and folds, picking up the dough and folding it over on itself. Cover and rest for 30 minutes.
After resting, complete a set of coil folds, sliding your slightly wet (or gloved) hands underneath the bulk of the dough and picking it up over the bowl, letting the weight of the dough fall down. Tuck the ends under each other, turn the bowl 90 degrees and do another coil fold.
At this point, you can cold ferment your dough in the fridge (see the above post) or transfer the dough to an olive oiled cake pan.
Gently press the dough out to the edges and dimple slightly with oiled hands. Cover and proof for 30 minutes.
After 30 minutes, lightly oil your hands and dimple the dough again. Cover and let rest for another 30 minutes or until completely doubled and very poofy.
Heat the oven to 450°F and drizzle the top of the focaccia generously with olive oil. Dimple one last time and sprinkle on flaky sea salt and fresh rosemary.
Bake for 20-25 minutes or until the top of the focaccia is golden and crisp and the focaccia is cooked through (you can use an instant read thermometer inserted into the middle, it should read between 190–210°F). Remove and let cool for 30 minutes, then slice and enjoy!
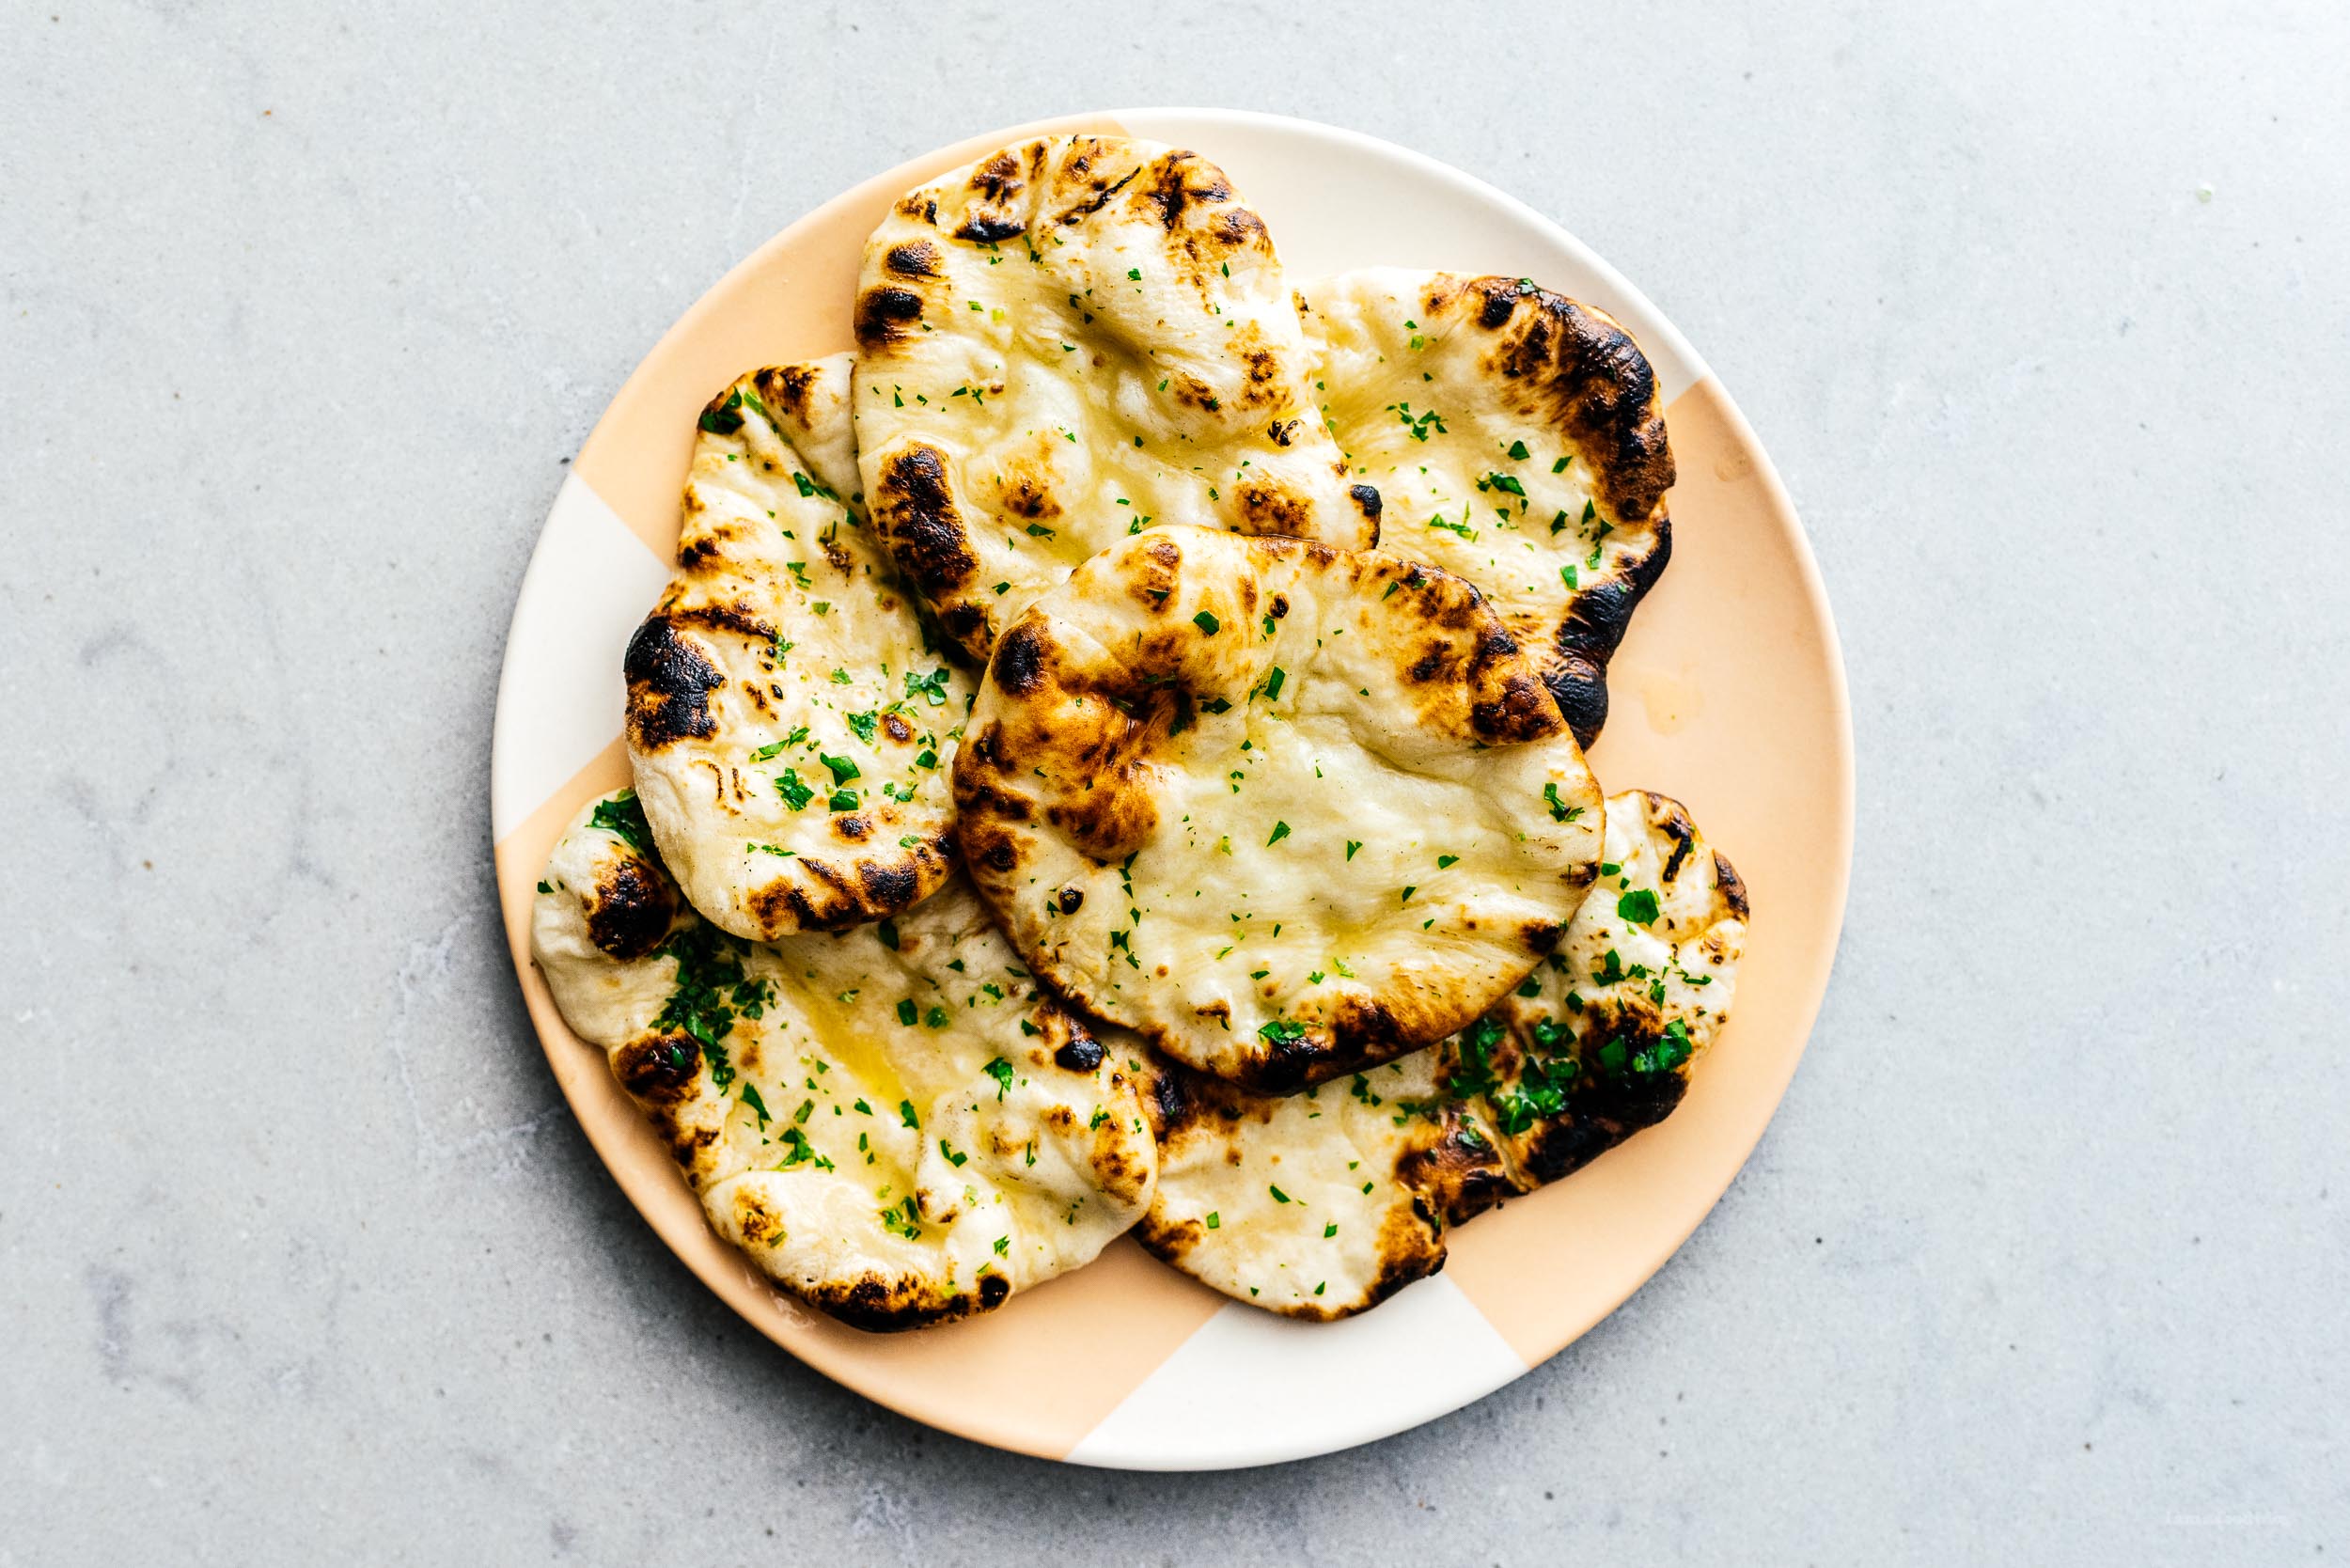
I Am... The Easiest Naan
Making homemade naan is easy and delicious – it’s the fastest, best bread you’ll make at home. This naan recipe comes together super quick. It’s soft and puffy, just like the bread you get at your favorite Indian restaurant. A recipe for naan is something every home cook should have in their back pocket. This recipe gets it tang and softness from milk and yogurt. The fluffy plushness is thanks to baking powder and soda which is amazing because you don’t need to proof it as long as you would with yeasted dough.
What is naan?
Naan is a type of flatbread, popular in India, South Asia, and Indonesia. The kind we’re talking about here specifically, is Indian-style bread baked in a super hot tandoor oven where the bread gets puffy and bubbly. Most home cooks use a (hopefully gas) stove top with a hot cast iron skillet because who has a tandoori at home?! (Some people, actually. They even make not-well-rated mini tandoori ovens for home) Naan is soft yet crispy, puffy and lush. It’s basically the best flatbread you’ll ever eat. If you like fresh homemade bread, you’ll love this recipe. Side note, although a lot of people call it naan bread, it’s kind of funny because the word naan actually means bread. So really, you’re saying “bread bread”. It’s kind of how like when you say shrimp scampi you’re saying “shrimp shrimp.”Naan ingredients
- Milk. I use 2% milk because it’s usually what I have in the fridge but this recipe will work with any kind of milk. If you’re vegan, you can make a vegan version by using a plant-based milk.
- Yogurt. Yogurt gives your bread a bit of tang and flavor. I’ve made this with Greek yogurt, regular yogurt, kefir, and soy yogurt.
- Flour. Simple all-purpose flour is what you need. If you’re looking to sub whole wheat, you can use 3/4 cup whole wheat with 1/4 cup all-purpose.
- Baking powder and baking soda. This is a yeast free recipe which is perfect because you don’t need to wait for it to rise. Instead it gets its fluffiness from baking powder and soda.
- Sugar. We need just a touch of sugar for a bit of sweetness. There’s only 1/4 teaspoon in this whole recipe so you can always skip the sugar if you want to be sugar-free, you probably won’t miss it.
- Salt. You need just a touch of salt to make your naan sing. We like our homemade naan more neutral, so be sure to adjust the salt level to your personal salt taste.
- Butter and herbs. Butter and herbs are optional but so delicious. We use melted butter and chopped cilantro, but you can use all kinds of herbs and spices. Try parsley, mint, green onions, garlic, cayenne, cumin, graham masala, chili powder, the world is your oyster! If you’re making vegan naan, sub olive oil or a vegan butter.
How to make naan
- Whisk. Whisk the milk and yogurt together in a liquid measuring cup.
- Combine. In a large bowl, stir together the flour, baking soda, baking powder, salt, and sugar. Make well in the middle and add the yogurt mix in bit by bit with a rubber spatula. Knead into a soft dough, gather into a ball, cover, and let rest for 1 hour.
- Shape. Give your dough a little knead on a lightly floured work surface then divide it up. Use a rolling pin to roll it out into ovals or circles. You’ve made naan!
- Bake. Heat up a heavy bottomed cast iron skillet over high heat. Brush the naan with water and place in the skillet water side down and cover. When it bubbles and rises, take the lid off and then flip it over and cook the other side.
Variations
- Mini naan - Divide the dough into 8-10 pieces and make naan dippers then cook as usual.
- Giant naan - Divide the dough into 2 and then cook as usual. If your naan isn’t rolling out large enough, let the dough rest longer. The longer it rests, the more relaxed the dough will be and the larger you’ll be able to roll it.
- Garlic naan - To make garlic naan, melt together 1/4 cup butter with 4 cloves minced garlic and 1 tbsp finely chopped parsley or cilantro. Brush the garlic butter on both sides of cooked naan and enjoy.
- Cheesy naan - To make cheesy naan, divide the dough into four pieces then roll them out. Place 2 tbsp shredded cheese into the middle of each naan and seal it in the middle by pinching together the edges. Let it rest briefly, then use a rolling pin to roll it out. Cook as per usual.
How to store naan
Naan tastes best fresh. But if you want to make it in advance, just cook it and leave it plain, without butter. Let it cool off completely then store in an airtight container or zip top bag. It should keep for up to three days.How to freeze
To freeze, just cook it and keep it plain, then let it cool completely. Wrap tightly in plastic wrap before putting it in an air tight container or bag. It should keep frozen for up to 2 months.Reheating
Microwave
Lightly brush with water and heat briefly, in 20 second intervals until it’s warm and pliable. When it’s warm, brush with melted butter and finish with chopped herbs.Oven
Heat the oven to 400°F. Lightly brush the naan with water and heat on a baking sheet for 2-3 minutes. When it’s warm, brush with melted butter and finish with chopped herbs.From frozen
Let thaw at room temp before reheating, either in the microwave or oven.What to serve alongside
- butter chicken
- basmati rice
- butter paneer
- dal makhani aka black dal
- tandoori chicken
- chicken tikka masala
- chicken biryani
Naan Recipe
The best flatbread you’ll ever eat.
- 1/4 cup milk
- 1/4 cup yogurt
- 1 cup all purpose flour
- 1/4 tsp baking powder (+ an extra 1/8 tsp)
- 1/4 tsp baking soda
- 1/4 tsp sugar
- 1/8 tsp salt
- 1 tbsp butter (melted, to serve)
- 1 tbsp fresh cilantro (chopped, to serve)
In a small bowl, whisk together the milk and yogurt. Set aside.
Mix the dry ingredients together in a bowl or on a clean work surface. Make a well and slowly add in the milk-yogurt mix bit by bit, combining with the flour. Knead into a soft dough. Gather into ball and cover for 1 hour.
Lightly dust your work surface with flour. Divide the dough into 4-6 equal pieces and use a rolling pin to flatten and stretch out.
Heat up a heavy bottomed or cast iron skillet (with a lid, preferably a glass lid) over high heat. Brush one side of the naan with water and place in the skillet, water side down.
Cover the pan and cook for 30 seconds, then check it to see if has started to bubble and rise. If it has, use a pair of tongs and take it off the pan and cook the uncooked side over direct flames until it starts to char. Alternatively, flip and cook the pan until it starts to brown.
When the naan is browned on both sides, brush with a bit of melted butter and sprinkle on chopped cilantro. Repeat with the remaining dough. Enjoy warm.
via Indian Simmer

I Am... Lo Mein
Give me a huge bowl of lo mein and I will be the happiest person in the room. I haven’t eaten in a mall food court in ages, but when I did, I would always order the biggest container of lo mein. It could be beef or chicken lo mein, heck, it could be plain with only sauce. I’m just all about the noodles. This year, our lunar new year feast is going to be two steamed fish, wonton, chow mein, and this lo mein. Yes, you read that right, two kinds of noodles.
What is lo mein?
Lo mein is a super popular noodle dish that you’ll find both at restaurants and made at home. In Cantonese, lo mein means “mixed noodles”. In Mandarin, it’s pronounced “lao mian” and translates exactly the same. Essentially, it's egg noodles mixed with sauce - somewhat similar to chow mein, but not quite. In truth, it can mean a variety of different kind of noodle dishes, much like how you can order spaghetti in a variety of ways. In North America, we tend to associate lo mein with the American Chinese take out style of noodles: somewhat thick egg noodles stir fried and tossed with a soy based sauce, vegetables, and proteins. Technically there are two kinds of lo mein, Cantonese Hong Kong style and American Chinese take out style. Both are a mixed stir fried noodle dish.- Cantonese lo mein is a kind of deconstructed soup noodle: thin and chewy egg noodles served on a plate with toppings and a bowl of soup on the side. The sauce for the noodles isn’t mixed in. Instead, you’re supposed to stir it into the noodles yourself. “Lo” means to mix or stir. Mein, of course, means noodles.
- American Chinese lo mein is a stir fry noodle dish: thick noodles mixed with a soy sauce based sauce and toppings like beef, pork, chicken, or vegetables.
Chow mein vs lo mein
The main difference between lo mein and chow mein are the noodles used. Lo mein noodles are thicker and chewier and chow mein noodles are thinner and crisper. Chow mein is cooked longer in the pan so the noodles become crispy and lo mein is simply tossed so the noodles stay soft. Pictured below: soy sauce chow mein. Both kinds of noodles are made with flour, water, eggs, and kansui (which is what makes the noodles yellow and chewy). They differ mostly in hydration and shape. Lo mein noodles have a higher hydration and are thicker which makes them chewier and more plush. Chow mein noodles are thinner, drier, and crisp up more because they have a lower hydration. After cooking, lo mein noodles are soft and supple and chow mein noodles are springy and chewy. Once you have dark soy sauce, you should definitely try this chow mein recipe.How to make lo mein
This is probably the easiest take out dish you can make. All you need to do is make a quick sauce, cook the noodles, add some veggies, and toss:- Make the sauce. In a small bowl, mix together light and dark soy sauce, toasted sesame oil, sugar, and ground ginger.
- Cook the noodles. Cook the noodles according to the package, drain, and set aside.
- Fry the aromatics. Heat up a bit of oil and lightly fry some garlic until it smells amazing.
- Add the mix-ins. I kept this simple with veggies, but you can add protein too, more on that later.
- Toss. Add the noodles and sauce into the pan and toss everything until it’s evenly coated.
- Enjoy. That’s it! Slurp away.
Lo mein noodles
For lo mein you need lo mein noodles. You can find them at your local Asian grocery store or you can substitute spaghetti or any long pasta.- Fresh pre-cooked lo mein noodles. In an ideal world, you’ll find cooked lo mein noodles in the refrigerated section of your local Asian grocery store. Sometimes they’re called oil noodles. They keep them with the fresh noodles and dumpling wrappers. Since they’re already cooked, you don’t need to boil them. Open up the package, place the noodles in a colander, and give them a rinse with hot tap water, loosening them with your hands. Drain well.
- Fresh uncooked lo mein noodles. You’ll also find fresh uncooked noodles in the same section. Cook them according to the package and drain thoroughly.
- Spaghetti. If you can’t find lo mein noodles, you can easily substitute spaghetti. Dried spaghetti is ideal, and you can even use any other long pasta of your choice.
Lo mein sauce
The sauce is what makes this dish so addictive. It’s a simple umami filled mix of light and dark soy sauce, toasted sesame oil, sugar, and a hint of ginger. It’s super easy to make a batch of lo mein sauce and keep it in the fridge so you can easily make lo mein whenever the craving hits. In a large measuring cup, mix together:- 1/2 cup light soy sauce
- 1/4 cup dark soy sauce
- 1 tbsp plus 1 tsp toasted sesame oil
- 1 tbsp plus 1 tsp sugar
- 2 tsp ground ginger
What is dark soy sauce?
Dark soy sauce is a thick, dark soy sauce that’s slightly less salty then regular soy sauce. It’s extra dark from a longer fermentation of soy beans. You might be tempted to skip dark soy sauce, but if you have the chance to buy a bottle, do it because it’ll last you a long time and bring a lot of joy into your life! Dark soy sauce adds a beautiful glossy brown to Chinese dishes and also adds caramel sweetness and depth. You can find it online or at your local Asian grocery store.Toasted sesame oil
Don’t sleep on toasted sesame oil. It’s pure nutty, toasty aromatic umami. The toasted stuff is completely different from regular sesame oil. Our favorite is Kadoya, which comes in an iconic yellow topped bottle. It’s available online and in most grocery stores.Mix ins
The beauty of lo mein is that you can add virtually anything to it and it will taste amazing. Any and all proteins and vegetables are welcome to the party. Just make sure to cut everything into bite size pieces.How to velvet meat
This recipe is completely vegan, but we often make it with either chicken, pork, or beef. The secret to super tender, juicy meat in lo mein (or all Chinese stir fries) is velveting. Velveting is the classic Chinese technique of marinating meat with cornstarch, oil, and seasonings. This helps tenderize and season the meat. The cornstarch gives the meat a small barrier against heat so it stays extra juicy when you’re cooking it.Chicken lo mein
Slice 1/2 lb chicken breast or thighs into 1 inch pieces and toss in a quick marinade: 1 tbsp soy sauce, 1 tsp dark soy sauce, 1 tsp oil, and 1 tsp cornstarch. Add to the pan after the garlic is fried and cook, stirring occasionally until cooked through. Proceed with the rest of the recipe.Beef
Slice 1/2 lb sirloin, flank, or tri-tip steak into 1 inch pieces and toss in a quick marinade: 1 tbsp soy sauce, 1 tsp dark soy sauce, 1 tsp oil, and 1 tsp cornstarch. Add to the pan after the garlic is fried and cook, stirring occasionally until cooked through. Proceed with the rest of the recipe.Pork
Slice 1/2 lb pork chop or pork shoulder into 1 inch pieces and toss in a quick marinade: 1 tbsp soy sauce, 1 tsp dark soy sauce, 1 tsp oil, and 1 tsp cornstarch. Add to the pan after the garlic is fried and cook, stirring occasionally until cooked through. Proceed with the rest of the recipe.Shrimp
Peel and devein 1/2 lb shrimp and toss in a quick marinade: 1 tbsp soy sauce, 1 tsp dark soy sauce, 1 tsp oil, and 1 tsp cornstarch. Add to the pan after the garlic is fried and cook, stirring occasionally until cooked through. Proceed with the rest of the recipe.Spicy lo mein
To make these noodles spicy, stir in 1-2 tsp of your favorite hot sauce into lo mein sauce. I like using chili oil or chili crisp - my favorite is Lao Gan Ma.
Why you should make lo mein at home
- It’s fast. Making lo mein is not some complicated affair, it comes together in one pan and it’s fast! Faster even than ordering takeout. Plus it’ll be fresher and hotter.
- It doesn’t need any fancy ingredients, just one good bottle of soy sauce (two if you’re feeling fancy), toasted sesame oil, and fresh or ground ginger. Super easy!
- You can add anything you want to it. Think clean out your fridge style, add all and any veggies that are languishing in the crisper. Veggies for health, noodles for fun!
- The sauce is delicious on EVERYTHING. The sauce is what makes these noodles delicious and super addictive. You can even make up a big batch, keep it in a squeeze bottle in the fridge, shake it up and then just squeeze it into the pan.
FAQ
- What kind of noodles Oil noodles are my noodle of choice (see above in the noodles section) but you can definitely use spaghetti or buy dried noodles on amazon. Wu Mu brand dry noodles, from Taiwan are egg free and really popular.
- Are lo mein noodles gluten free? Lo mein noodles aren’t gluten free but if you like, you can make this recipe with rice noodles, which are gluten free. You need to make sure to rinse off the rice noodles after cooking in cool water because they have a tendency to stick together. After you rinse them off, follow the recipe as usual.
- Why do you need two types of soy sauce The mix of dark and light soy sauce is what makes this recipe shine! The light soy sauce adds saltiness and umami and the dark soy sauce adds a beautiful glossy color, a touch of caramel sweetness, and depth. If you don’t have dark soy sauce, you can skip it, but it’s what really makes this recipe a winner.
Fresh lo mein noodles
You can find fresh noodles in one of the refrigerated fresh noodle section of your local Asian grocery store. If you live in America, a popular brand is Twin Marquis. They have several packages of lo mein noodles, ones that are uncooked and ones that are cooked. The cooked ones are called “cooked noodle” or oil noodles. For the uncooked noodles, make sure to follow the package directions for boiling and draining before using in this recipe.What to serve with lo mein
- Sesame chicken
- Potstickers
- Garlicky gai lan
- Spicy wonton
- Honey garlic pork ribs
- General Tso’s chicken
Lo Mein
Way better than takeout
- 2 tbsp light soy sauce
- 1 tbsp dark soy sauce
- 1 tsp toasted sesame oil
- 1 tsp sugar
- 1/2 tsp ground ginger
- 1 lb lo mein noodles or spaghetti (prepared, see notes)
- 1 tbsp oil
- 4 cloves garlic (minced)
- 1 cup mushrooms (sliced, crimini preferred)
- 1 small carrot (julienned)
- 1 cup snow peas
- 2-3 cup spinach (baby spinach preferred)
- green onions (thinly sliced, to finish, as needed)
In a small bowl or measuring cup, whisk together the soy sauces, sesame oil, sugar and ground ginger. Set aside.
Heat the oil over medium heat and add the garlic and cook, stirring occasionally until slighly golden.
Turn up the heat to medium high and add the mushrooms, cooking and tossing occasionally, until soft.
Add the carrots and snow peas and toss for 1-2 minutes, until tender crisp.
Mix in the noodles, spinach, and sauce. Toss until well combined. Taste and season with salt, if desired. Sprinkle on the green onions and enjoy immediately.
Cook the lo mein or spaghetti according to the package. If you are using precooked lo mein noodles, loosen gently under hot tap water. Drain well.

I Am... Gochujang Garlic Spicy Noodles
It only takes 15 minutes and 8 ingredients for these extra delicious garlicky spicy noodles. These noodles are saucy, spicy, a little bit sweet, and full of umami. They’re extra garlicky and vegan and healthy. You can even add extra protein and veggies to this to bulk it up and make it a whole meal. These noodles are super versatile and the best part is that they come together amazingly quickly. We love noodles so much that we wrote a whole cookbook dedicated to noodles. We never tire of eating and making noodles at home and we’re always noodling around with new recipes. This is one of our classic go-tos: a super simple umami packed sauce with wide chewy noodles. They’re ready in under 15 minutes and are full of flavor.
Ingredients
- wide noodles - I’m using knife cut Chinese shanxi planed ribbon noodles or dao xiao mian (刀削面). They sell them at Asian grocery stores or you can buy them online. They’re essentially a wheat noodle with frilly edges that have a wonderfully silky chewy texture that holds up well to sauce. You can use any wide noodle you have in your pantry.
- neutral oil - we need a bit of oil to cook up the garlic and toast the red pepper flakes so that everything gets amazingly fragrant and delicious.
- garlic - 6 cloves of garlic because we’re garlic lovers. Feel free to adjust as needed.
- red pepper flakes - this is what is going to bring the heat. This recipe calls for 1 tsp which is just spicy enough without being overpowering, but that depends on your spice levels. Remember, you can always add spice but you can’t take it away, so start small.
- soy sauce – umami and saltiness to combine with the tiny bit of sugar we’ll add for a sweet and savory sauce.
- gochujang - a little bit of gochujang (a spicy Korean sauce) adds savory sweetness and so much flavor. More on gochujang below.
- brown sugar - just the lightest touch of brown sugar to highlight all the savory and spicy notes.
How to make spicy noodles
- Cook the noodles: bring a large pot of water to a boil and cook the noodles according to the package directions.
- Make the sauce: While the noodles are cooking, add the oil and heat the garlic and red pepper flakes in a nonstick pan over medium heat, stirring until the garlic is fragrant. Stir in the soy sauce, gochujang, and honey.
- Mix: Add the noodles to the pan and toss until all the noodles are glossy and coated. Loosen with a bit of noodle water if needed.
- Enjoy!
How to customize spicy noodles
These spicy noodles are infinitely customizable, especially with the spice. I use gochujang as the hot sauce base of this recipe but you can use your favorite Asian chili sauce: sriracha, sambal oelek, even chili crisp. I like the funky sweet and savory flavor that gochujang brings to the table because it adds so much depth of flavor.Help, I don’t want these too spicy!
You can make these more or less spicy depending on how many red pepper flakes you use and your choice of hot sauce. You can also leave out the gochujang to make it even less spicy. Or, if you like the flavor of gochujang, just be sure to get the package that is mild.You call this spicy!??
If these noodles aren’t spicy enough for you, definitely increase the chili pepper flakes and the amount of gochujang you’re using. Also, pro tip, use chili flakes that are fresh, they tend to be spicier. Some specific pepper flakes you can try:- Gochugaru - A seedless Korean pepper that’s sweet and mellow with not too much heat.
- Aleppo chili flakes - fruity and earthy with a bit of heat and a touch of cumin.
- Guajillo chili flakes - very earthy and more heat
- Sichuan chili flakes - spicy but not too spicy unless you use a huge amount. My all time favorite chili flakes!
What is gochujang?
Gochujang is a delicious spicy Korean sauce. It’s a savory, sweet, spicy thick paste made from chili powder and sticky rice. It adds sweet and heat and a ton of flavor. Traditionally it comes in tubs, but these days you can find it in convenient squeeze bottles in the Asian aisle of literally any grocery store and online, of course. It’s what makes so many Korean recipes spicy and ruby red.What to serve with spicy noodles?
We like serving them with veggies and a protein for a balanced meal. You can also serve them with:What kind of noodles for spicy noodles?
To be honest you can use any kind of noodle you love even pasta. Usually we go for whatever’s in the pantry. Some noodles to try:- instant ramen noodles (ditch the packet)
- thin rice noodles
- Chinese egg noodles
- udon
- ramen
- pasta, especially long pastas
- vermicelli
- lo mein
Gluten free noodles
If you’re looking for gluten free noodles, I recommend wide rice noodles, like these ones here.How to cook wide rice noodles:
- Bring a large pot of water up to a rolling boil.
- Add the noodles to the boiling water and cook according to the package directions, loosening with chopsticks or tongs.
- When the noodles are done, drain well and rinse with cool tap water, making sure the noodles don’t stick together.
- Use immediately in the spicy sauce.
If you’re looking for other spicy noodle recipes, give these ones a try:
- Super easy Sichuan dan dan noodles
- Buldak noodles
- Garlic lemongrass noodles
- Chili oil pantry noodles
Chili Garlic Spicy Noodles
15 minutes and only 8 ingredients for some extra delicious garlicky spicy noodles!
- 8 oz noodles (wide noodles preferred)
- 2 tbsp neutral oil
- 6 cloves garlic
- 1 tsp red pepper flakes (or to taste)
- 2 tbsp soy sauce
- 1 tbsp gochujang (optional)
- 1 tbsp brown sugar
Toppings (optional)
- toasted sesame seeds
- green onions (sliced)
- gochugaru (Korean chili flakes)
Bring a large pot of water to a boil and cook the noodles according to the package directions.
While the noodles are cooking, add the oil, garlic, and red pepper flakes to a large nonstick pan over medium heat, stirring until the garlic is fragrant. Stir in the soy sauce, gochujang, and brown sugar.
When the noodles are ready, add them directly from the cooking pot to the pan and toss until all the noodles are glossy and coated. Loosen with 1-2 tbsp noodle water if needed. Enjoy!
Estimated nutrition does not include optional toppings or gochujang.

I Am... Best Japanese Cheesecake Recipe
Promised to be one of the greatest Japanese cheesecakes in Tokyo is Mr. Cheesecake. If you’ve had the pleasure of visiting Japan, you’ll notice that if there’s one thing that people are willing to line up for, it’s good food. Be it chewy udon noodles, fluffy shokupan, or crispy gyoza, if it’s good there’s going to be a line. We’ve joined many lines in Tokyo and the results were almost always out of this world.
The best Japanese cheesecake
Mr. Cheesecake is touted as Tokyo’s most elusive and exclusive cheesecake. Ironically, there are no lines...but only because they don’t have a physical store. The creamy rectangular shaped cheesecakes are sold online for just two days a week and sell out in minutes. Japanese food fanatics have started calling it the phantom cheesecake. Even if you do manage to be one of the lucky ones who get to purchase a cheesecake, you can’t choose the date or time of delivery. Behind Mr. Cheesecake is chef Koji Tamura. His cheesecakes are made with an indulgent combination of cream cheese, sour cream, heavy cream, yogurt, tonka beans (a super fragrant bean with warming flavors like vanilla, cherry, almond, and cinnamon), white chocolate, vanilla beans, and lemon. The result is an incredibly creamy yet light cheesecake that’s reminiscent of Basque cheesecake, but much more delicate. Tamara recommends having it three ways: frozen, straight from the fridge, and at room temperature. The different temperatures affect the taste and texture. Unfortunately we never had the chance to order a Mr. Cheesecake while in Tokyo, but luckily chef Tamura released an official recipe online. The recipe, while having several different steps, is really simple to execute. And the result is delicious: super creamy, super luscious, lightly sweetened, tangy cheesecake. I made the cheesecake twice, once in a regular loaf pan and once in a mini pan. I didn’t quite get the height that I wanted in the regular size loaf pan or in the mini, so I suspect that they must use a Japanese standard size. Nonetheless, I love this cheesecake. I froze some for the sake of doing three side-by-side taste tests.What makes this cheesecake so delicious?
The frozen cheesecake from the fridge had a firm frozen custardy texture with the lemon really shining through. From the fridge the cheesecake had that classic melt in your mouth texture with a hint of vanilla and balance of sweetness. Room temp was my favorite with a melty almost creamy middle that was velvety and soft, almost reminiscent of a creme brûlée but cheesecake-y and a bit more firm.How to make Mr. Cheesecake
- Cream. Stir the cream cheese along with the sugar over a double boiler until smooth.
- Melt. Heat the cream with the chocolate until the chocolate is melted.
- Mix. Combine the cream cheese mix and chocolate cream mix.
- Make the batter. In a seperate bowl, mix together the sour cream, yogurt, egg yolks, and vanilla. Whisk the cornstarch in until smooth.
- Combine. Stir everything together.
- Bake. Pour the batter into a lined baking tin and bake in a water bath. Let cool completely and enjoy!
The Best Japanese Cheesecake Recipe
A creamy Japanese cheesecake recipe that is so popular it sells out in minutes!
- 200 grams cream cheese (room temp, about 3/4 cups)
- 100 grams sugar (about 1/2 cup)
- 100 grams cream (about 6 tbsp)
- 50 grams white chocolate (about 1/3 cup)
- 180 grams sour cream (about 3/4 cup)
- 50 grams greek yogurt (about 1/4 cup)
- 2 egg yolks (room temp)
- 9 grams lemon juice (about 2 tsp)
- 1/4 vanilla bean (optional)
- 1 tsp vanilla extract
- 20 grams cornstarch (about 2.5 tbsp)
Preheat the oven to 365°F. In a bowl over a double boiler, mix together the cream cheese and sugar, stirring until the sugar is dissolved and the cream cheese is smooth. Remove and set aside to cool slightly.
In a small saucepan, heat the cream just until the edges start to bubble. Take it off the heat and add the chocolate and stir until the chocolate is melted and the mixture is smooth.
Pour the cream and chocolate mixture into the cream cheese mixture and combine until smooth. Stir in the vanilla bean, if using.
In another bowl, mix the sour cream and yogurt together. Mix in the egg yolk, lemon juice (if using), and vanilla extract. Whisk in the cornstarch.
Stir the yogurt mix into the cream cheese mix, whisking until smooth. Strain through a sieve to remove any lumps (and the vanilla bean). Transfer the batter to a standard size loaf pan lined with baking paper.
Place in a large baking dish and pour hot water into the dish to create a water bath. Bake for 25 minutes at 365°F then rotate and reduce the temp down to 300°F and bake for another 15-20 minutes. Broil slightly for a charred golden top, if desired.
Remove the pan from the water bath and cool on a rack for 30 minutes before removing the cheesecake from the pan and chilling in the fridge to cool completely.
Enjoy either from the fridge, frozen, or at room temp. From the fridge the cheesecake will have that classic melt in your mouth texture with a hint of vanilla and balance of sweetness. Frozen tastes a little bit like frozen custard with lemon and room temp tastes velvety and soft.
I’ve included cups and tablespoon measures here for convenience, but I strongly recommend using the weight measures as cream cheese, yogurt, and sour cream don’t lend themselves well to being measured with dry measures.

I Am... How to Make the Viral Tiktok Cucumber Salad
The viral Tiktok Cucumber Salad that seems like it’s pretty much everywhere thanks to the Tiktok cucumber guy. Summertime is all about cold salads and food that doesn’t make you overheat. Cucumber salad fits perfectly into that category and it’s no surprise that it’s viral. He’s created a whole cucumber community. I hope cucumbers won’t start selling out at the grocery store.
Who is the TikTok cucumber guy?
Logan Moffitt–aka @logagm–is a seemingly normal dude from Canada who loves to eat cucumbers and kimchi. A lot of his videos are of him making kimchi or eating Korean food, especially cold Korean noodles. Even before he made this cucumber salad, I came across his Tiktoks. He does collabs with K-POP bands and other viral Tiktokers. He was pretty popular before the cucumber thing, but now he’s even more popular. His cucumber videos are in the millions. Not just the one video, every single cucumber video has millions, even up to 10s of millions of views. People really, really love his cucumber salads.What is the viral cucumber guy recipe?
I’m not certain, but the very first cucumber recipe I saw Logan make was a classic garlicky, soy-sesame cucumber salad. It’s savory, a tiny bit sweet, crunchy, and super refreshing. It’s where I first heard his what seems to be catchphrase: “Sometimes you just NEED to eat a whole cucumber.” I mean, he’s not wrong!How to make the Tiktok cucumber guy salad
- Slice - thinly slice your cucumber. Use a mandolin if you have one, it makes slicing cucumbers a breeze. Slice them right into a deli quart container.
- Add - add soy sauce, toasted sesame oil, fish sauce, sugar, MSG, grated garlic, sliced green onions, and toasted sesame seeds to the cucumber slices.
- Toss - put the lid on your container and shake until mixed.
- Enjoy - take off the lid and enjoy the cucumber salad right out of the deli container, using chopsticks for maximum enjoyment, just like Logan.
Ingredients for Tiktok cucumber salad
- cucumber - you need a cucumber and it’s got to be a whole seedless English cucumber, aka the cucumbers you see at the grocery store.
- soy sauce - soy sauce is going to add saltiness and umami. Use whatever brand you have at home, hopefully, it’s naturally brewed.
- toasted sesame oil - it’s got to be toasted sesame oil, not un-toasted. Toasted sesame oil is nutty, aromatic, and so delicious.
- fish sauce - fish sauce is going to add an extra boost of flavor. Fish sauce is truly the best and I love that there’s a viral recipe that has fish sauce it in.
- sugar - just a little bit of sugar is going to balance out the savoriness of all the umami-forward ingredients and make it so you just can’t stop eating cucumbers.
- MSG - a lil sprinkle of MSG is going to make this cucumber salad even more addictive. There is so much misinformation and literature on MSG out there. but all you need to know is: it’s naturally derived and exists in tomatoes and parmesan cheese and you eat it all the time. If you don’t have any MSG in your pantry, I recommend the Ajinomoto panda because it’s so cute.
- garlic - garlic and cucumbers just go together.
- green onions - green onions add a fresh, slightly sharp bite.
- toasted sesame seeds - toasted sesame seeds for crunch and nuttiness.
Equipment needed for Tiktok cucumber salad
The truth is, you don’t need any special equipment to make this cucumber salad, but if you want to do it like the kids, here’s what you’re going to get:- deli quart containers with lids - I love quart containers for storing leftovers and they truly are amazing for shaking up a whole cucumber salad. These deli containers are the most popular on Amazon and they have great reviews.
- mandolin - if you’re going to be eating a lot of sliced cucumber salads, do yourself a favor and get a mandolin. Just make sure you watch your fingertips as you’re slicing. We have trusty OXO Good Grips one but I’ve always wanted a classic Japanese Benriner. Benriners are beloved by those in the food industry because they’re no nonsense, sharp, and boast a minimalist aesthetic.
- microplane - a microplane will give you tiny little gratings of garlic, which is perfect for distribution in your salad. To be honest, we almost always use a garlic press, but this little ginger and garlic grater is SO CUTE,
I kind of want it.Update: Mike got it for me and I love it!
Cucumber salad variations
Cucumber guy has gone viral for the recipe in this post, but since he has a whole cucumber community, he has SO MANY other cucumber recipes. It’s cucumber of the day, every day. Every single recipe starts with a while cucumber, a mandolin, and a deli quart container. The cucumber possibilities are endless.Other cucumber salads
- Watermelon Salad with Feta, Cucumbers, and Herbs
- Sunomono Japanese Cucumber Salad
- Chinese Cucumber Avocado Salad
- Miso Smashed Cucumber and Green Bean Salad Recipe
TikTok Cucumber Guy Recipe
The viral cucumber salad from tiktok
- 1 cucumber (sliced)
- 1.5 tbsp soy sauce
- 1 tbsp toasted sesame oil
- 1 tsp fish sauce
- 1 tsp sugar
- sprinkle msg
- 1 clove garlic (grated)
- 2 green onions (sliced)
- 1 tbsp toasted sesame seeds
Use a mandolin to directly slice the cucumber into a deli quart container. Alternatively, use a knife to thinly slice a cucumber and place it in a bowl.
Add the soy sauce, toasted sesame oil, fish sauce, sugar, MSG, garlic, green onions, and toasted sesame seeds to the container (or bowl).
Place the lid on the container and shake until the cucumber slices are coated evenly with all the ingredients. If your cucumbers are in a bowl, toss well.
Enjoy immediately, or place in the fridge and marinate for a couple of hours then enjoy. The cucumbers will be crunchier the faster you eat the salad, so if you want a fresh cucumber salad, enjoy immediately. If you want more of a quick pickled cucumber salad, let marinate for 1-2 hours before enjoying.

I Am... Creamy Chicken Alfredo
Creamy chicken alfredo is perfect for a weeknight dinner: Super juicy pieces of chicken in a smooth and creamy, extra cheesy alfredo sauce. It's been heat wave after heat wave here, and I'm so looking forward to winter: ski season; hibernating underneath our kotatsu (a Japanese heated table with a blanket on it to trap all that delicious warmth; it’s the best thing ever invented) and spooning up bowl after bowl of this creamy chicken alfredo. It’s comfort food at its best: spoonable, cheesy, creamy, carb-y goodness. This dish hits just right. The parmesan cheese is full of salty umami, the chicken is perfectly juicy, and the noodles are the perfect vehicle for the rich, savory, buttery alfredo cream sauce.
What is alfredo sauce?
Classic alfredo sauce has just three ingredients: butter, cheese, and pasta water. That’s it! They combine together into a smooth and rich sauce that’s perfect with pasta (read more about classic alfredo here!). But, like so many foodstuffs that have been lovingly adapted, nowadays, especially in America, people think of alfredo as a thick white cream sauce, made with heavy cream and garlic, a la Olive Garden. Alfredo is kind of used as a blanket term for almost all Italian white sauces.It's just creamy chicken pasta
Italians, look away! I know what you are thinking, this alfredo is a travesty and in no ways does it resemble your beloved simple, three ingredient alfredo. I absolutely agree with you! This is just a super simple weeknight take on alfredo that comes together in 15 minutes. I know regular alfredo is also super simple and only takes about 15 minutes too, but this is the kind of recipe where you throw everything in a pot, set it and forget it. There are juicy pieces of chicken, perfectly al dente noodles, and a rich sauce that clings to each and every piece of pasta. It’s satisfaction in a bowl and it’s all made in the instant pot.Creamy chicken alfredo ingredients
I love this recipe because it really only takes 9 ingredients. Heck, if you wanted to leave out the parsley, it would be 8! All you need is chicken, penne, chicken stock, garlic powder, cream, cornstarch, butter, and grated parm.- Chicken - I used chicken thighs because I love how juicy they are, but you can definitely do this with chicken breast.
- Penne - Short pastas are perfect in the instant pot and penne is great because the lil holes fill up with so much saucy goodness. Feel free to use any short pasta here or even fettuccine. If you do use fettuccine, you’ll have to break the pieces in half.
- Cream and cornstarch - we’re going to help our sauce be super glossy with the help of heavy cream and cornstarch. The cornstarch is going to help thicken everything and the cream is going to add a gorgeous creamy flavor.
- Parmesan - go for freshly grated! It melts nicer and taste so much better than the stuff you buy pre-grated at the store.
You can make pasta in the instant pot?
Yes! You can put raw pasta in the instant pot and pressure cook it. While it cooks, it soaks up all the creamy delicious sauce that you’re pressure cooking it in. As a bonus, the starches that are released help thicken up the sauce, making it cling to the pasta perfectly. The best part is that cooking pasta in the instant pot means that it’s truly a one pot dish without any draining or extra steps.But you don't need one
If you don't have an instant pot (or got rid of yours) you can make this easily on the stovetop, even as a one pot pasta if that's what you like. Simply follow the directions minus pasta and once it comes to a boil, reduce to a simmer and then add pasta. Continue cooking until your chicken is cooked and your pasta is done to your liking, and follow the remaining steps.How to make chicken alfredo in instant pot
- Add chopped up chicken, penne (or pasta of choice), chicken stock, and garlic powder to the insert of the instant pot. Stir well to combine then cook on high pressure for 5 minutes.
- While the instant pot is doing its thing, whisk together some cream with a tiny bit of cornstarch in a small bowl. Take this time to finely grate the parmesan cheese.
- When the instant pot is done, quick release the pressure, then carefully open the lid. Turn the pot on sauté medium and stir in the cream-cornstarch mix as well and butter. Simmer, stirring occasionally, until slightly thickened, then stir in the parm until it melts and all the noodles are coated and creamy. Taste, season, spoon into a bowl and enjoy!
Chicken Alfredo Recipe
Super juicy pieces of chicken in a smooth, creamy, extra cheesy alfredo sauce.
- instant pot
- 1 lb boneless skinless chicken thighs (cut into 1" pieces)
- 8 oz pasta (penne preferred)
- 1.75 cups chicken stock
- 1 tsp garlic powder
- 1/2 cup cream
- 1 tbsp cornstarch
- 2 tbsp butter
- 4 oz Parmigiano Reggiano cheese (finely grated)
- 2 tbsp fresh flat leaf parsley (chopped)
In the Instant Pot insert, add the chicken thighs, penne, chicken stock, garlic powder. Stir well to combine.
Cook on high pressure for five minutes. While the Instant Pot is doing it’s thing, whisk together the cream with the cornstarch in a small bowl. When done, quick release the pressure and carefully open the Instant Pot.
Turn on sauté mode on medium heat and stir in the cream and cornstarch mix, and the butter. Simmer, stirring occasionally, until slightly thickened. Stir in the parmesan and parsley, taste and season. Enjoy!

I Am... Dispersed Camping at Alabama Hills
Mike and I are campers and one of our more unique camping spots this year was Alabama Hills. We go camping easily 10+ times a year. Not the hike-in, back packing kind of camping though. We're unapologetically car campers: we have an 18" tall double wide inflatable mattress with real sheets. We're almost glamping kind of people (and we've done that too!). I’m all about the campsites and Mike’s all about the gear. We’re both obsessed with camp food because food outdoors just tastes better.
The Alabama Hills
Full of large rock formations and an endless sky, Alabama Hills is a nature lovers paradise. If you’re looking for a remote, but not too remote boondocking experience, this is a great place to dip your toes in. This is a place we've been back to more than once, because we loved it so much.What is boondocking?
Boondocking, in case you aren’t familiar, is free, dispersed camping. In America, you can disperse camp on public lands managed by the Bureau of Land Management and the US Forest Service. The number one rule for boondocking is leave no trace. Pack it in, pack it out. It’s nature so there are no resources and you have to bring everything in and take it with you when you go. The appeal of boondocking for us is a quiet camp experience in a gorgeous setting. Alabama Hills hit all the right notes and more.What are the Alabama Hills?
The Alabama Hills are a National Scenic Area in California. Essentially, it’s a range of rock formations and hills that are part of the Sierra Nevada mountain range. The area is beautiful, full of endless sky, huge boulders, and picturesque tumbleweed. At night, the stars spill across the sky, bright points of yellow, orange, and red in the deepest, inky blue-black you’ll ever see.Where are the Alabama Hills?
The Hills are in the Owens Valley in California and the closest tiny populated area is called Lone Pine. To get to the Hills, you drive on Highway 395 towards Lone Pine. At the stoplight on Whitney Portal Road, turn West, drive 2.5 miles to Movie Road (that's it below), turn right, and you’re there.What is Alabama Hills known for?
I’m not a movie buff, but Alabama Hills is where almost all the Westerns were shot in the early period of Hollywood. It’s isolated and rugged and the perfect backdrop for shooting any sort of movie that needs a rocky backdrop. There are literally thousands of movies that have been filmed here. Two of the more modern ones are: Iron Man and Django Unchained.Where can you go camping in Alabama Hills?
Camping in Alabama Hills is getting more and more difficult as the years go on with its increasing popularity. It used to be that you could drive through, looking for a camp spot and stop for the night. Now, you need to get a free camping permit online before even considering camping. The permit doesn’t guarantee a spot, it just allows you to camp. All of the camping in Alabama Hills is first come, first serve. There are designated dispersed campsites marked with a little tent symbol, some of them being only accessible by 4WD. We camped in one of those and although we had 4WD, in Mike's opinion any reasonable high clearance vehicle would have made it easily, at least when dry. If you’re planning to go, you can check out this map that shows you exactly where the dispersed sites are.Camping in Alabama Hills
If you’re doing dispersed camping, get a permit and make sure you read through the rules and regulations. After that, check out the map so you have an idea of where the campsites are. It’s best to arrive earlier in the day, but not too early, around 1 pm is probably ideal. When you find an empty spot, pitch your tent and enjoy the Hills. If you want to have a campfire, be sure to get a campfire permit and check if there are any campfire restrictions. If you’re good to go, you can use the existing fire rings in the campsites. The other way to camp in Alabama Hills is to go to an actual campground. Tuttle Creek is just outside of Alabama Hills. It’s first come first served as well, but it has all the standard campground facilities and if you can’t find a dispersed spot, this is the best place to head to.What is the best time to camp in Alabama Hills?
Alabama Hills is extremely popular, so you’ll need to plan accordingly. It’s open year round but you’ll want to avoid the busiest times if you can. The weather, specifically the temperature is a concern, so if you don’t do well in heat, you probably want to avoid the summer. The busiest time in the Hills is, unsurprisingly, spring and fall, when the temperatures are the most comfortable. We went in the height of summer because we love the heat and honestly, we had a lot of fun and loved the fact that it was so empty.Hiking in Alabama Hills
The one hike you should do is the Arch Loop Trail. You can see two rock arches: the Heart Arch and the Mobius Arch. It’s a 1 km long hike for the loop and it’s relatively flat and easy. Along the way you can get views of Mount Whitney and all of the other Sierra peaks.Why should you go camping in Alabama Hills?
If you love the stars or astronomy, Alabama Hills is an excellent place to camp. It’s not a dark sky preserve, but it’s very, very dark (Bortle Class 2, if you’re an astronomy geek) and you will see SO MANY STARS. You can see the Milky Way with your naked eyes and if you’re there when there’s no moonlight, you might be able to spot the Andromeda and Triangulum galaxies. The Triangulum Galaxy will show up as a faint smudge of light not a swirly spiral, but it’s amazing that you can see so many light years away. Andromeda is the easiest galaxy to see: it looks like a slightly elliptical fuzzy star. It’s brighter and bigger, so you don’t have to be in somewhere like Alabama Hills, but if you’ve never tried to see it before, while you’re camping is the time! Mike and I absolutely loved our one night stay in Alabama Hills. It was lonely, in the best way possible, as in, we were alone with each other, miles away from other people. If you’re an introvert, you’ll love it. Just you, the rocks and the sky. I’m so happy we got to camp there. It’s one of my favorite memories with Mike. xoxo -steph Read More →
I Am... Dishoom’s Ruby Chicken Curry Recipe
Dishoom’s chicken ruby curry is everything: spicy, sweet, savory, and utterly addictive. When we're in London Steph and I love going to Dishoom: the fun atmosphere, creative cocktails, and of course the food, which is carefully tuned to be just a little less authentic: not too spicy, not too extreme. We’ve made many of their recipes and they've all been hits. Strangely however, we’ve never made what is arguably their signature dish, until now.
Dishoom’s Ruby Chicken Curry
This ruby chicken was awesome and so easy to make. It’s like the next step in Indian curry chicken. If you like butter chicken or chicken tikka masala, you'll love this: still sweet and a total crowdpleaser, but a little more complex and satisfying and adult. We had it with homemade cheddar naan, but it would go great with just about anything: basmati rice, garlic naan, or even more chicken via Dishoom’s chicken biryani (biryani is like a mixed rice).Grilled Chicken
The chicken all by itself is amazing. We had a few pieces fresh off the grill and it was mind blowingly good. It's like an even easier chicken tandoori. If you’re feeling lazy, you can totally skip the whole curry part and just marinate and grill the chicken to eat with just about anything. It’s some of the best grilled chicken – from any cuisine – I’ve ever had. If you do go just chicken, you might want to pull back a bit on the spice. Indian chili powder can be pretty over the top spicy, depending on which one you use.Cooking Notes
The original recipe contains sugar and honey. I omitted both because the cherry tomatoes I used were plenty sweet, but if you like sweetness, you might want to add a tablespoon of sugar back in. I also skipped the dill and kasoori methi (aka fenugreek) powder, and combined the two cardamoms into one, because I didn’t want to buy herbs & spices just for one dish. The deggi mirch chili powder specified in the OG recipe is just a mild variety of indian chili powder; I subbed the standard (spicier) one we have at home. Last but not least, the ginger garnish is really really good, don't skip it.We loved it
This was an awesome and really delicious curry that was mostly hands off and totally foolproof. It looks like a long ingredients list, but it's mostly duplicates between the chicken and the curry, and it looks like a lot of time, but it's just an overnight marinade. The actual cooking was more like an hour. I highly recommend doubling or tripling this recipe. I’m definitely going to be adding this one to our dinner list, especially that awesome grilled chicken. No curry no life -MikeDishoom’s Ruby Chicken Curry Recipe
Chicken
- 1 lb boneless skinless chicken thighs (cut into 2” chunks)
- 1/4" fresh ginger (finely diced)
- 5 cloves garlic (crushed)
- 1 tsp Indian chili powder
- 1 tsp ground cumin
- 1/2 tsp garam masala
- juice of 1/4 lime
- 1 tbsp neutral oil (such as grapeseed)
- 1/4 cup kefir or greek yogurt
Curry
- 4 cloves garlic
- 1/2" fresh ginger (plus extra for garnish)
- 1/2 cup neutral oil (such as grapeseed)
- 1 bay leaf
- 4 pods green cardamom
- 1 stick cinnamon
- 14 ounces cherry tomatoes (blended)
- 1 tbsp butter
- 1 tsp Indian chili powder
- 1/2 tsp garam masala
- 1/2 tsp ground cumin
- 1/4 cup heavy cream (aka whipping cream)
In a medium bowl, mix the marinade ingredients together, then toss chicken until evenly coated. Wrap and store in the fridge to marinate 6 hours to overnight.
Making the curry takes about 45 minutes. Start by crushing or finely dicing the ginger and 2 cloves of the garlic. A mortar and pestle is ideal. Set aside.
Roughly chop the remaining 2 cloves of garlic. Add the 1/2 cup oil to a large pan and set over medium high heat, then add the garlic. Cook garlic until golden brown, about 2-3 minutes, watching carefully to ensure it doesn't burn.
Remove the garlic with a skimmer or slotted spoon and set aside. Add the bay leaf, cardamon, and cinnamon. Cook for about 1 minute, or until the cinnamon stick opens.
Reduce the heat to medium and add the reserved ginger-garlic paste from step 2. Cook until paste has browned a little, about 5 minutes, then add the blended tomatoes, being careful of splattering. Cook, stirring occasionally, until the sauce is reduced about 2/3 and darkened, roughly 15 minutes.
Add the butter, chili powder, garam masala, cumin, the reserved crispy garlic from step 4, and a pinch of salt. Cook for another 10-15 minutes, or until sauce has reduced by about 1/2, then stir in the cream. Cook for another 5 minutes, then remove from the heat and set aside while you make the chicken.
Preheat your grill on high. Oil the grates well, and then skewer and and cook the chicken until charred and just cooked through, 8-10 minutes. If you don't have a grill handy, fry the chicken in 1-2 tbsp oil until just cooked through.
Add the chicken to the curry and simmer for another 5 minutes, stirring evenly to coat.
Plate and garnish with ginger matchsticks and cilantro (optional).
Adapted from Dishoom's cookbook, via The Guardian

I Am... Sour Cream and Onion Pasta
Sour cream and onion is a perfect combination for more than just chips, it works on pasta too.
Sour cream and onion
Do you have a favorite chip flavor? When I was a kid my absolute favorite was sour cream and onion. Weird, I know. Everyone else around me was obsessed with barbecue or Doritos but for me it was sour cream and onion all the way. Funny thing is, I haven’t had a sour cream and onion chip in a while. That is, until Mike and I were watching this YouTube show that we love. They did a giant snack bracket competition and the winning snack was sour cream and onion chips! We had a little conversation about it and somehow Mike came up with the awesome idea of sour cream and onion pasta. What’s funny is that Mike doesn’t even like sour cream and onion. He’s never bought a bag and the most he’s ever had is a chip or two. He’s definitely missing out because sour cream and onion is a perfect combination. After trying this pasta he’s a convert!What is sour cream and onion pasta?
Essentially I took all the flavors of sour cream and onion chips and put it into a pasta sauce. Sour cream and onion flavor is literally sour cream and onions so I basically made a bechamel (white sauce) with sour cream and chives stirred in. I had a little mental debate on whether the “onion” in sour cream and onion were onions, green onions, or chives and ultimately I went with chives because they have a more pronounced onion-y flavor. We tested this pasta with green onions too and it tastes just as good but I love the way chives look because they look like baby green onions.How to make sour cream and onion pasta
- Cook your pasta. Cook your favorite pasta shape according to the package in boiling salted water.
- Make a roux. While your pasta is cooking, make the sour cream and onion sauce by melting some butter in a pan. When the butter is melted, stir in some flour to create a roux (see tips below)
- Add milk. When the roux is cooked, stir in the milk and let the sauce thicken.
- Add the sour cream. Take the sauce off the heat and stir in the sour cream.
- Add the onions. By now your pasta should be done, so drain it and add it to the sauce. Stir in the chives, salt, and pepper, and enjoy!
How to Make a Roux
The key to a really smooth creamy white sauce (béchamel) is making sure that the roux is well mixed and cooked. When you are adding the flour to the just melted butter, sprinkle it on evenly, instead of just dumping it in a clump in the middle of the pan. Sprinkling the flour ensures that all of the flour kernels are coated with butter which helps them emulsify into the sauce smoothly. When the roux is cooked – it will turn a very slight creamy color, be texture of white sand, and smell a little nutty – it will take about 2 minutes. Using a whisk, it really helps move everything around. A well cooked roux will turn into a beautiful creamy white sauce perfect for pairing with pasta.What to serve with sour cream and onion pasta
To be honest we just ate this as is, as a bowl of creamy comforting carbs. But, if you like, you can serve it with:- garlic parmesan knots
- focaccia
- everything bagel rolls
- dijon mustard chicken
- garlicky mushrooms
- crunchy oven baked pork cutlets
- grilled romaine salad
- coleslaw
Sour Cream and Onion Pasta Recipe
- 5 oz pasta
- 1.5 tbsp butter
- 1 tbsp flour
- 1/2 cup milk
- 1/2 cup sour cream
- 1/4 cup fresh chives (sliced)
- salt and freshly ground pepper
Cook the pasta according to the package instructions in a large pot of salted water until al dente.
Meanwhile, while the pasta is cooking, make the sauce: Melt the butter in a frying pan over low heat. When melted, sprinkle on the flour and stir in, cooking over medium low for 2-3 minutes.
Slowly stream in the milk while whisking. Whisk until smooth, turning up the heat to medium so that the sauce starts to bubble and thicken.
When thick, turn off the heat and whisk in the sour cream until smooth.
When the pasta is done, scoop it out using a slotted spoon into the sauce. Toss to coat until everything is well sauced and glossy. If needed, thin out the sauce slightly with some of the pasta water. Add the chives and mix well. Taste and season with salt and pepper. Enjoy hot!

I Am... The Search for Perfect Purin in Tokyo
Have you ever had Japanese purin? Purin, or pudding, is essentially Japanese crème caramel or flan, made with the same sort of exacting perfection in which Japan treats all culinary deliciousness. You might know it as caramel custard, egg pudding, or caramel pudding, but no matter what you call it, it’s insanely good. Purin is both the most seductive and the most unassuming dessert I know. The top glistens with glossy deep dark caramel that gives way to a impossibly jiggly soft-yet-firm creamy base that just begs to be cut into with a spoon. At the same time, most people tend to pass over purin in favor of fluffy Japanese pancakes, Japanese cheesecake, or taiyaki. Still, something about purin speaks to a deep need in me. I have deep feels for purin. Indulge me, if you will, and read along for my search for the perfect purin in Tokyo.
What is purin?
To talk about purin, we kind of need to go way back to the beginning of how Japan got into yōgashi, or Western style sweets and desserts. Japan’s very first experience with yōgashi happened with the Portuguese in the 16th century. From there, castella sponge cake (kasutera) became incredibly popular. They’re still popular today, being one of the top omiyage (edible souvenirs) from Nagasaki. Once Western-style sweets became popular, vanilla custard based ones became especially so, the most popular being purin, of course. “Purin”, derived from the English “pudding,” was initially a luxury food due to the lack of dairy after World War II. After dairy became more available, purin started showing up everywhere, from ultra luxe purin a la mode at hotels to little plastic cups in combini convenience stores. Those little fluted plastic cups of Pucchin Purin have been around since the early seventies and are to Japan what chocolate Snack Packs are to North Americans.Purin's cult following
Purin is really popular in Japan. There are purin flavored snacks, chocolates, candies, ice cream, you name it. There’s even a Sanrio character called Pompompurin, a chubby little golden retriever with a caramel beret. Japanese people love purin; so much so that there is even a giant make-it-at-home “king pudding” gelatin pudding mix with pre-made caramel that comes in a bucket that you use as the pudding mold. It makes more purin than you could ever know what to do with and to be honest, I kind of wanted to try it. Purin is definitely one of those beloved nostalgic desserts and lately, purin is becoming even more trendy. Purin kind of has a cult following these days: there are instagrams dedicated to purin, hours long line ups, and premium purins that sell out long before you have even heard of them. Part of the appeal is that purin can be, like many Japanese foods, both high and low end. There are literally dozens of affordable purins you can buy at the grocery store, as well as dedicated high end purin stores. You can even make purin at home. Because purin is something that both children and adults enjoy, I feel like it’s a true part of Japanese culture, much like ramen, sushi, and shokupan. The rich culture behind purin is partially why I set out on a journey to search for the best purin in Tokyo. But also, it was just because I love purin. I can spend hours on the purin hashtag on Instagram, dreaming of eating purin. There’s something about the way it looks, the way it jiggles, and the joy I get when I use one of those fancy paddle-like purin spoons to carve out that first bite that brings me an immeasurable amount of joy.Our search for the perfect purin
Mike by the way, does not share my purin obsession, but he was more than willing partner in purin. Partly because I think he wanted to make me happy and partly because I think he thought it was so funny that purin turned out to be a lot more complicated than I thought. Anyway, we were lucky enough to spend a large chunk of time in Japan earlier this year before the pandemic hit. We spent our days wandering with plenty of breaks for snacks. It’s my all time favorite way to explore a city and my love for purin was growing as much as I was. I was diving deeper into my obsession daily by feeding my addiction with combini (convenience store) purin, but one day, while we were at a bookstore, I saw the cutest little paperback book. It had rows and rows of stylized illustrated puddings on the cover and I spent 20 minutes flipping through the pages before Mike gently told me that I should buy it instead of creepily drooling at the photos.My purin bible
The pudding book was perfection: full color, chock-full of pictures, all about the famous puddings of Tokyo. Yes, there are famous puddings in Tokyo. And this book was going to show me all of them. To say I was excited was an understatement. With the help of trusty google translate (thank goodness for that scan and translate feature, shout to the devs at google translate!) I made a little purin map, in hopes that we would wander across one (or seven) purin shops a day. Purin, as I soon discovered, is a competitive sport in Japan. There are rules, times, and lines. Okay, no, there aren’t really that many lines but that’s because the pudding usually sells out before lines can even start to form. I loved eating purin in Tokyo. I highly recommend it, even if you only go to one purin place or just pick up purin from the combini. Purin is part of the Japanese soul and my search for perfect purin was something that brought me joy, deliciousness, and frustration, all in equal parts. Read on for all the purins I tried, as well as ratings on ambience, location, ease, taste, and aesthetics.4/4 Seasons Coffee
This was my all time favorite purin that we tried in Tokyo. 4/4 Seasons is a very popular coffee shop in Shinjuku - they roast their own selection of single-origin coffee beans daily and are known for both their coffee and their purin. In fact, their purin is the very first purin featured in the Tokyo purin book.Purin Review
The purin is a classic round shape with a deep, dark caramel that contrasts with the beautiful yellow-hued pudding. It’s topped with a dollop of whipped cream and the quintessential candied red cherry with a stem. It comes on Japanese ceramics and it’s a purin that evokes a cute nostalgic retro vibe in a modern cafe setting. It was a perfect match for an icy cold brew coffee, which complimented the sweetness of the purin perfectly.How To Get It
4/4 is relatively easy to get to as it’s located in Shinkuku (Ni-chome, which is not really what tourists think of Shinkjuku, it boarders it on the East side) but the purin sells out quickly and it’s only available after 1 pm, so it’s not the most convenient. We once got there (I think we had three 4/4 purins during our 2 week stay) at 12:55 and the lady serving us said that they weren’t selling purin yet. She did let us order in advance though and brought us our purin promptly at 1 pm.Final Thoughts
The purin at 4/4 is classic. The caramel offers a gentle bitter contrast to the sweetness of the purin, which is just the right texture: somewhere between firm and yielding. Seriously SO GOOD. What every purin wants to grow up to be. Ambience: 4/5 Location/Ease: 3/5 Taste: 4.5/5 Aesthetics: 5/5 Address: 4/4 Seasons Coffee, 2-7-7 Shinjuku, Shinjuku, Tokyo 160-0022Baku Coffee Roasters
Baku is a cute little coffee shop where they roast their own coffee and the owner/barista hand selects and focuses on specialty beans from Southeast Asia. It’s a small shop that’s housed in a former timer store with hipster vibes.Purin Review
The purin was creamy and firm and the caramel was just bitter enough. It’s a purin that goes very well with black coffee. I loved the little Japanese pottery that it came on. It’s a rustic purin with no adornments and Sumi Okamura (the owner) means for it to be solid and simple. A joy to eat!How To Get It
Baku is kind of in the middle of nowhere if you’re a tourist, but it is right next to Monzen-nakacho Station so it’s not hard to get to. You’d have to make a trip intentionally to the shop for purin but if you’re a coffee lover you will probably want to anyway.Final Thoughts
There was the cutest dog hanging out while we were there and the purin was delicious. Baku is the second purin featured in the Tokyo pudding book. Ambience: 4/5 Location/Ease: 3.5/5 Taste: 3.5/5 Aesthetics: 2.5/5 Address: Baku Coffee Roasters, 1-21-11 Tomioka, Koto, Tokyo 135-0047Dixans Jimbocho
2025 Update: The Jimbocho shop is closed, but the original in Suidoubashi is still open and going strong with a great rating on Tabelog! Dixans Jimbocho is the second shop of the popular Dixans cafe - the original is in Suidoubashi. The OG Dixans does a perfectly plush piece of toast that I absolutely adore, but don’t make the mistake of going there thinking you’ll get to order purin, they only have purin at the Jimbocho location, which I learned the hard way.Purin Review
This was one of the pricier purins of the ones we tried, but that’s because they sell it as a set with a drink. It comes in a little ceramic skillet and with the most perfect quenelle of amaretto cream on top. Cutting into it was pure satisfaction. It was smooth, yet firm and the not-too sweet amaretto cream was the perfect slight almond-y compliment.How To Get It
We had just finished a satisfying bowl of udon at Udon Maruka and decided to walk it off and head over to the Dixans in Suidoubashi for purin. When we got there, they were like, but we only serve purin at Jimbocho. The Dixans Jimbocho is literally one block away from Udon Maruka. Facepalm moment right there. Anyway, when we finally made it there, another day, I was super worried because they sell out of the purin before noon. Luckily, even though it wasn’t displayed in the case of pastries, they had some in the back.Final Thoughts
If you’re looking for cafe vibes and an Insta-perfect purin, look no further than Dixans Jimbocho. Don’t worry though, Dixans’ purin isn’t just about looks, it tastes good too. Ambience: 4/5 Location/Ease: 3/5 Taste: 3.5/5 Aesthetics: 4/5Egg Baby Cafe
Egg Baby Cafe is one of those places that again, you’ll see all over Instagram, but mostly for their sandwiches. It’s a super popular cafe that focuses on —you guessed it— egg dishes. I think they’re going for a New York kind of vibe with lots of brunch-y menu items. Their egg sandos look amazing but we were there for one reason: purin.Purin Review
This was my first slice of purin. All the other ones were of the round variety. I liked it okay. It was smooth and firm, and more on the sweet side. It came with a dollop of whipped cream which helped cut the sweetness. There was beer at Egg Baby Cafe so Mike was happy :)How To Get It
Egg Baby Cafe is in Ueno, which is a super cute area. We happened to wander by the cafe at around 11am and I got SO EXCITED when I saw all the slices of puddings in silver dishes lined up in a row. We made our way to the counter to order but of course the lady said, “purin is only after 2pm.” The purin gods are frustrating! Sometimes you have to go early or they’ll be sold out but sometimes if you go early, you just can’t get it. What do they want from me?! I already worship at the alter of purin. Just give me purin!! Anyway, we went back promptly at 2 (I swear the lady smirked when she saw us) and I got my little retro sundae dish of sliced purin.Final Thoughts
This place was all most all looks, no substance. Maybe the egg sandos are better? Ambience: 3/5 Location/Ease: 2/5 Taste: 2.5/5 Aesthetics: 3/5 Address: Egg Baby Cafe, 5-10-9 Ueno, Taito, Tokyo 110-0005Iijikan
Iijikan is a cute little cafe/bar in Kojimachi. It’s popular for lunch sets and also dinner and after dinner drinks. It’s funny because it’s right in a neighborhood that Mike and I are super familiar with but is probably not on the radar for most tourists.Purin Review
They are known for the purin here and for good reason. It was smooth and creamy, firm and sweet with the perfect contrast from the caramel which was generous and just bitter enough. Super well balanced. The dollop of softly whipped cream on top was lovely too. I love how it was served in a retro cup - I just wished it had the cherry on top because I’m a sucker for cherries on top. It was such a charming experience.How To Get It
We stopped in on a rainy day and it was the coziest experience ever. They serve purin from 11:45am onwards.Final Thoughts
I had a purin and coffee and Mike had a beer with pizza toast. The pizza toast was the best pizza toast EVER and they have a large selection of craft beers and Japanese wines. It’s definitely on my to-revisit list. Ambience: 4/5 Location/Ease: 4/5 Taste: 4/5 Aesthetics: 4/5 Address: Iiijikan Kojimachi, 3-10-8, Kojimachi, Chiyoda 102-0083Cafe Chianti
Cafe Chianti is an Italian restaurant that specializes in pasta and sweets. I actually didn’t know that this cafe was in the Tokyo purin book until after we went here. I just happened to see it on Instagram.Purin Review
The purin is the sliced square kind and it’s a medium firmness with a nice eggy flavor and feeling. It was on the medium sweet side and it came with rum raisins and a little bit of cream. I liked it but it wasn’t my favorite. The caramel was just a bit too light for me. Plus I really like it when purin comes in a purin cup (or on pretty pottery). This was on a plate and to be honest the plating was out of the 80s.How To Get It
Cafe Chianti is in located in Matsuya Ginza, a department store on the main strip in Ginza. We stopped in for an afternoon break and getting the purin wasn’t a problem at all.Final Thoughts
It was so cute seeing all the old Japanese obachan (grandmas) having sweets sets. I ordered the purin and a coffee and Mike ordered a beer. Ambience: 2/5 Location/Ease: 5/5 Taste: 2.5/5 Aesthetics: 1/5 Address: Cafe Chianti, Matsuya Ginza 8th Floor, 3 Chome-6-1 Ginza, Chuo City, Tokyo 104-8130Parlor Ohashi · 純洋食とスイーツ パーラー大箸
Parlor Ohashi is run by a Michelin starred chef who just so happens to run a retro new-style kissaten coffee shop. Kissaten, if you’re not familiar with them, are tearooms slash coffee shops popularized in the Showa era (1926 to 1989). They serve sweets and classic Japanese cafe foods like napolitan spaghetti, sandwiches, yaki soba, toast.Purin Review
Purin is a pretty classic kissaten dessert and Parlor Ohashi’s purin is probably one of my favorites. It comes served in a silver pudding cup in a pool of burnished black caramel topped with a dollop of softly whipped cream that has just the tiniest hint of sake. It has just the right texture: firm but yielding with a rich sweet eggy-ness. The caramel was slightly bitter and a nice contrast to the sweetness of the purin itself. I tend to like caramels more on the burnt side, reminiscent of burnt tops of basque cheesecake.How To Get It
Parlor is located in Shibuya FUKURAS, which makes it extremely convenient. They serve the purin from open to finish and as far as I can tell, they never sell out. For these reasons alone we went back to Parlor multiple times during our trip. It was the perfect place for a quick coffee, purin, and beer break. The cafe itself is in the middle of a mall so don’t expect those dark and retro Showa kissaten vibes, but they still have cute banquette seats and its location can’t be beat.Final Thoughts
The only thing that would have been better is if they put a cherry on top. Ambience: 3/5 Location/Ease: 5/5 Taste: 4/5 Aesthetics: 4/5 Address: Parlor Ohashi, 1-2-3 Dogenzaka, Shibuya, Tokyo 150-0043, Tokyo 160-0022White Glass Coffee
Please, for the love of purin, do not go here. I’ve included it as a warning.Purin Review
There were a bunch of cute purins in the case so of course I ordered one. It was not good. The cheap ¥100 purin from 7-11 was even better. I was pretty much convinced that they got their purin from the combini but as we left, I saw a little sign in front of the purin that said homemade. Facepalm.How To Get It
It looked like a cute little cafe in the back streets of Shibuya and they have a nice space but the purin is absolutely horrible. We stopped in because (as per usual) I needed a break from the massive amount of walking we were doing.Final Thoughts
At least the cafe was cute, I guess. Ambience: 3/5 Location/Ease: 4/5 Taste: 1/5 Aesthetics: 2/5 Address: White Glass Coffee, 23-18 Sakuragaokacho Visionary Arts 1F, Shibuya, Tokyo 150-0031Ikkaku
This was one of those opportunistic purins.Purin Review
It was nothing to write home about, to be honest. It was cute and it tasted good, but not great. I prefer my purin with a darker more bitter caramel that accentuates the contrast between sweet and bitter.How To Get It
We just happened to be in in Hibiya Midtown (a really nice place to watch the sunset, if you’re ever interested!) We took a break from the cold and this place had a sign board that advertised purin.Final Thoughts
This guy did come on a pretty plate and the space that the restaurant was in was cute though! Ambience: 3.5/5 Location/Ease: 5/5 Taste: 2.5/5 Aesthetics: 3/5 Address: Ikkaku, 1-1-2 Tokyo Midtown Hibiya 3F Hibiya Central Market, Yurakucho, Chiyoda, Tokyo 100-0006Sign Kichijoji · Sign吉祥寺
2025 Update: Sign is permanently closed. Again, this was an opportunistic purin stop…I wonder what that says about me?!Purin Review
It was a perfect slice of purin, deeply burnished on the top, going into a lovely pale yellow on the bottom topped off with a dollop of softly whipped cream and a cherry. I loved it! And you know what?! It tasted AMAZING. Even Mike agreed and he didn’t really care for the majority of the purin that we tired. It was firm near the caramelized part and soft and silky near the top. The textural contrast was to-die-for and the flavor was bang on too: not too sweet but sweet enough. This was a purin where I didn’t mind the lack of bitterness from a more dark caramel because it was balanced right. I kind of wanted to order another one immediately, but I stopped myself.How To Get It
We were wandering around the Atre in Kitchijoji when I saw a pastry case with what looked like a purin cake, I was like, please, please, let’s go here. The branding of the cafe looked pretty cute so we put our names down even though it looked like there were a million seats inside. While we were waiting, I looked up reviews of the place and they were all horrible. Seriously, so so bad. But when I started telling Mike, the hostess called us so we just sat down. I ordered the purin and a coffee and Mike had a beer (notice a pattern? LOL) The purin came and I was SO happy. I don’t know if it was because I was sitting down and had caffeine or if it was because it was just so pretty. It really was pretty, in a perfectly retro diner sort of way.Final Thoughts
I’m really quite sad we didn’t order a second slice of pudding. Now I’m thinking, why!? With Covid here I may never get another chance especially since the reviews for this place are most definitely going to shut it down. Anyway, the service did leave something to be desired and we didn’t try any of the other food, but that purin…so good! Ambience: 2/5 Location/Ease: 5/5 Taste: 4.5/5 Aesthetics: 5/5 Address: Sign Kichijoji, 1-1-24 Kichijoji Minamicho Atre Kichijoji Honten 1F, Musashino, Tokyo 180-0003Takeaway Purin
Along with all of the cafe purin I had, I also indulged in multiple purin from the combini, supermarkets, and department stores. Most of the time I just got combini purin but I did manage to try one purin from a famous takeaway purin shop!Marlowe
Marlowe is surprisingly not in the Tokyo pudding book – there’s a section in the back for takeaway and store-bought purin – and I could not for the life of me understand why. Mike and I were discussing it and concluded that maybe everyone knows about Marlowe so there was no need to include it? Marlowe started way back in 1984 in Kanagawa (you probably know that woodblock print, The Great Wave off Kanagawa) as a restaurant but they quickly became known for their purin, which they made in little glass beakers. The beakers are so popular that people collect them. They have special collaborations with things like Hello Kitty and Star Wars, so it kind of makes you want to get them all. They also do limited time and seasonal flavors and all their purin is made with exclusive ingredients and they really shine through.Purin Review
I tried to pop it out perfectly into a purin dish (yes, we went to go buy a purin dish!) and it wasn’t the best looking but it tasted so good: smooth and firm with a generous amount of caramel that is just the right amount of bitter. Plus it’s kind of giant. Bigger than any other purin I’ve had. Super satisfying.How To Get It
Marlowe just recently opened in Tokyo and I didn’t know about it so I was extra surprised and happy when one day Mike randomly suggested we go into the super swank Ginza Six and head down to the food hall. The rows and rows of purin were extra enticing, but I just bought one which I now regret with a passion because I loved the purin but I also really love the beaker that it came in. It’s such a perfect souvenir.Final Thoughts
Marlowe is one of the top purin in all of Japan and it’s really no surprise. Ambience: n/a Location/Ease: 5/5 Taste: 4/5 Aesthetics: 3/5 Address: Marlowe Ginza, 6-10 GINZA SIX B2f, Ginza, Tokyo 104-0061Purin I did not eat but desperately wanted to
Conure
2025 Update: Conure is permanently closed. こぬれ広尾Conure is a reservations-only sweets shop that has no menu. It has esoteric hours and is out in Hiroo, somewhere where tourists don’t often go. We stopped by to see if we could grab one of their takeout purins – they sell them all day long, until they sell out – but even though we got there before noon the friendly grandma shook her head sadly at me. Their purin is the kind that is sliced, firm and smooth with a side of caramel, whipped cream, and rum raisins. Unfortunately it looks like Conure is one of the casualties of Corona so I guess I will never get to taste their deliciousness.Feb’s Coffee&Scone
I am obsessed with how Feb’s serves their purin. It looks so retro and cute to me: in a little silver dish with a perfect dollop of whipped cream and a candy red cherry. Mike and I tried going here three times! Once, they were randomly closed, one day we got there only to realize that they only sell their purin on certain days and the final time we tried they were open, but sold out! We got there early-ish, but they start selling their purin at 9am and sell out really early. RIP in peace Feb’s. Maybe I’ll get to try you as take-away one day. This wouldn’t be a complete write up without a shoutout to all the purin that we tried to get and couldn’t because of availability or line-ups. We tried to hit up Are, Kaiso, and Coffeehouse Nishiya. I wonder if they’re any good? Well, if you made this this far, you must be a fellow purin lover?! I hope one day travel will open up to Japan again and you get a chance to eat purin in Tokyo! Once you taste it, you too will be forever changed. Until then, purin and melon soda, and all retro Japanese desserts forever, xoxo steph PS - If you want to make your own purin at home, I have a retro Japanese purin recipe right here! PPS - If you are traveling in Japan with someone who isn’t a huge purin fan, don’t worry, the places that sell purin are usually coffee shops (oddly a lot of curry cafes sell purin too but we didn’t go to any of those) so your other can always just order coffee. They also usually sell beer, so if they’re like Mike, beer is an option too. Purin, coffee, and beer is the perfect break :) Read More →
I Am... Extra Creamy Cacio e Pepe Pasta
Cacio e pepe is classic: peppery cheesy noodle goodness. You don’t mess with classic, am I right? Well, the other day I saw some noodles on insta and I was immediately drawn in. They were super saucy, extra cheesy, and looked so cravable. It was a twist on cacio e pepe - instead of the starchy pasta water, pecorino, pepper, and pasta route, it went for a pecorino mornay sauce flecked with pepper.
The best cacio e pepe
I’m a huge fan of cacio e pepe in all its forms and its simplicity but sometimes we get messages from people who have problems with cheese clumping up or sauce that isn’t as smooth, glossy, or thick as they like. This cacio e pepe-ish pasta is here to save the day. Because the sauce is thickened with flour and thinned out with starchy pasta water, it has more body and clinging power than the classic sauce.Here’s how to make it
First, start off by melting some butter in a pan with plenty of freshly cracked black pepper. Black pepper is a key flavor in cacio e pepe and toasting it in butter helps coax out it’s spicy floralness. The heat of the butter will draw out flavor and the pepper will infuse the butter with all that goodness.What is Mornay sauce
Mornay sauce, for the uninitiated, is a classic French sauce built off of béchamel, a flour thickened milk sauce. Traditional mornay is made with gruyère cheese but this one uses pecorino, which is the cheese normally used for cacio e pepe. You can use parmesan if that’s what you have but if you see pecorino at the store, it’s worth a buy. It’s slightly sharper, more intense, and less nutty than parmesan because it’s made with sheep’s milk instead of cow. It really makes cacio e pepe amazing and if you’re looking for the same flavor cacio as the ones you get in an Italian restaurant, the cheese is the answer.Thicken the sauce
Next, it’s time to add our thickening agent, flour. Stir the flour in completely making sure there are no lumps. At this point, our goal is to coat eat flour granule with fat so that the flour easily combines with the milk to create a smooth sauce.Lump-free cacio e pepe
It's time to gradually add the milk. Adding it in slowly will help prevent lumps. Don’t worry if the sauce clumps up right away, just keep whisking over low heat.Glorious glorious cheese
Take the sauce off the heat and add the cheese in batches. The residual heat of the sauce will melt the cheese. The sauce will probably look kind of lumpy. Don’t worry though, we’re going to smooth it out with starchy pasta water. At this point, if you want to cool down the sauce and pop it in the fridge in a container, you can do so. If you do, you can have almost instant pasta any day of the week. When you’re ready to make your pasta, cook the pasta according to the instructions. Heat up the cacio sauce over medium heat, and whisk in some hot starchy pasta water until the sauce thins out slightly. Add the pasta and toss, adding extra pasta water if sauce is too thick. Finish everything off with extra cheese and pepper and enjoy!Super Creamy Cacio e Pepe Style Pasta Recipe
A protein packed creamy cacio e pepe style sauce perfect when you’re in the mood for mac and cheese, but trying to adult too.
- 1 tbsp butter
- 1 tsp freshly cracked black pepper
- 1 tbsp flour
- 1/2 cup whole milk
- 3 oz finely grated pecorino (about 1.5 cups)
- 1/4 cup pasta water (more if needed)
- 6 oz pasta (I used homemade garganelli)
In a skillet, melt the butter and add the pepper, letting the pepper infuse the butter as it melts. Stir in the flour and cook for about three minutes, until completely smooth and incorporated.
Pour in the milk in a thin stream while whisking. It might start out lumpy, but keep whisking and it will smooth out into a thick paste. Stir in the pecorino in batches, and remove from the heat. The sauce will be very thick.
Bring a pot of salted water to a boil and cook the pasta according the packaging or until it is al dente.
Take 1/4 cup of the hot starchy pasta water and stir it into the cacio e pepe sauce, whisking over medium low heat until smooth and glossy. Add the drained pasta, stirring in extra pasta water as needed until the sauce coats the pasta. Enjoy with extra pepper and crushed red peppers, if desired.
loosely based on https://www.pastasocialclub.com/post/cacio-e-pepe-style-pici

Latest Comment
“hi, yes to both! it might be a bit thin in a 13x9, so just be aware and keep an eye on it so it doesn’t over cook. If ...”Stephanie on Easiest Corn Pudding RecipePopular
 2015 Holiday Giveaway
  One-Pot Lemon Scallop Pea Spaghetti
  Beer Battered Onion Rings, Jalapeno Aioli
  2014 Holiday Gift Guide and a Giveaway
  Easy Gourmet Hot Wings and a Giveaway!
 The Ultimate Veggie Sandwich
  Vegan(!) Creamy Corn Soup Recipe
  Sunday Brunch: Grilled Cheese Eggs Benny
